
What does remote IT support do?
Remote IT support is all about providing IT assistance from a distance, thanks to the internet. Imagine having a tech wizard in your computer, ready to jump to your aid without the need for a physical visit. That's remote IT support in a nutshell. It's an efficient, tech-savvy way to solve computer and network issues, deliver updates, configure programs, and even conduct regular maintenance, all without setting foot in your home or office.
The services can range from the simple to the complex, such as deploying software updates and cybersecurity. We have found that normally, clients turn to remote support in an emergency situation, such as a system error, application corruption, program configuration problem, or when a Windows Update or malware causes problems.
The remote support control program "AnyViewer" will need to be installed, so we provide detailed instructions below.
Remote support session: prepaid, €50 per hour or part. See the price list for all our rates.
Start a session
- Complete the remote support questionnaire, which also confirms the preparation steps and the one-hour prepaid fee.
- Make sure you are connected to the internet, then open AnyViewer: Open AnyViewer (this link uses the
openav://link type that AnyViewer registers on your computer; if nothing happens, open AnyViewer from your desktop or Start menu). - Read the 9-digit ID and the temporary password shown in the AnyViewer window to our technician, and click "Allow" when the connection request appears.
Don't have AnyViewer yet? Follow the setup guide below (estimated setup time: 5-15 minutes).
AnyViewer setup guide: preparing for your remote computer support session
AnyViewer is a stable, fast, and secure remote desktop program that allows an IT technician to control your desktop PC or laptop from any location, as long as the devices are well connected to the internet.
This guide will help you set up AnyViewer on your computer so our technician can securely connect to your device and try to resolve your technical issues. You may want to print this page or save it for reference during the session.
Estimated setup time: 5-15 minutes.
Step 1: before you begin (preparation)
Please complete these steps before your scheduled support session:
- Ensure your computer is connected to a stable internet connection.
- If using a laptop, plug it into the mains (don't rely on battery power during the session).
- Close any sensitive documents or applications you don't want the technician to see.
- Have your desktop computer turned on and logged into your Windows user account.
- Make sure you have administrator privileges on your computer (if possible).
Note: our technician will only access your computer with your explicit permission and will explain everything they're doing during the session.
Step 2: download AnyViewer
Download the AnyViewer software using one of these methods.
Option A: download from our website (if the latest software is available)
- Visit our download page:
www.servtec.info/downloads - Click the "Download AnyViewer" button.
- Save the file to your Desktop or Downloads folder.
Option B: direct download from the AnyViewer.com website
- Open this link: https://www.anyviewer.com/download
- Click "Download Now".
- Save the file to your computer.
- Or use this link for an automatic download: https://www2.aomeisoftware.com/download/rc/AnyViewerSetup.exe
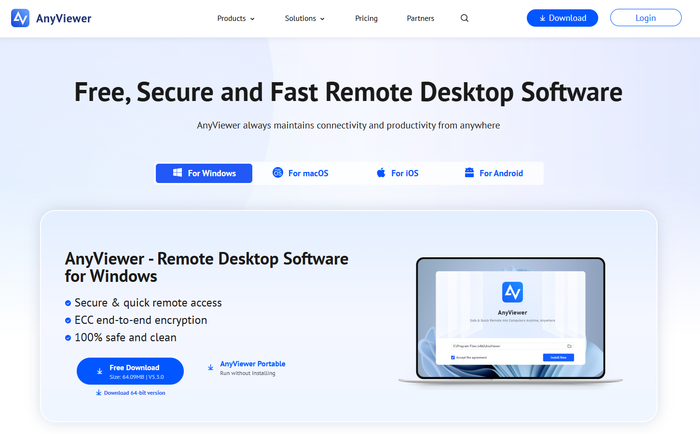
Security note: only download AnyViewer from official sources like our website or anyviewer.com. Do not use links from unknown emails; most of these are malware.
Go to https://www.anyviewer.com/help/overview.html for guides for various versions of Windows.
Step 3: install AnyViewer
- Locate the downloaded file (usually in your Downloads folder or on the Desktop).
- Double-click the AnyViewer setup package named
AnyViewerSetup.exe.

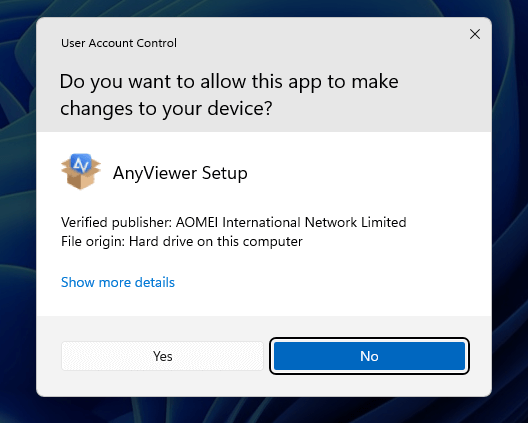
- If you see a security warning, click "Run" or "Yes" to continue. Or you may be asked whether to allow this app to make changes to your device; click "Yes" to allow installation.
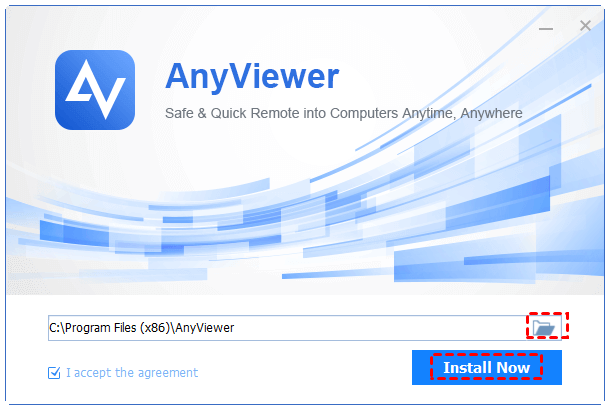
- If it appears, click "Install Now" to start the AnyViewer installation.
- Follow the installation prompts:
- Accept the license agreement (if it appears).
- Choose the installation location (the default is recommended). The application is set to be installed on the C drive by default; if you need to install it on another drive, you can click the folder icon to choose another drive.
- Wait for the installation to complete. After a while, AnyViewer will be installed on your PC and you can click "Enjoy Now" to use the app for remote control and remote support.
- Click "Finish" or "Enjoy Now" when the installation is complete.
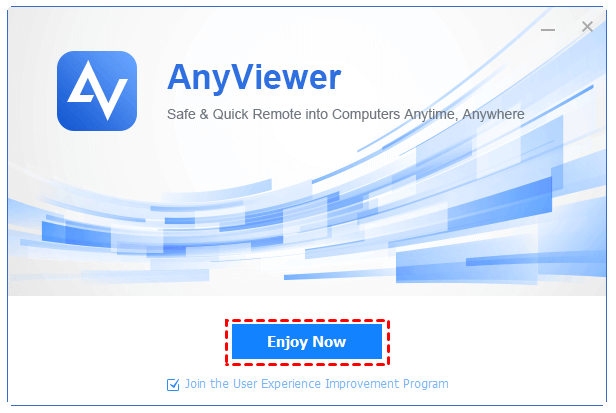
Note: AnyViewer does not require a complex installation. The process is quick and simple.
Step 4: run AnyViewer
- After installation, AnyViewer should open automatically, with the 9-digit device ID number clearly visible.
- If it doesn't open, look for the blue "AV" AnyViewer icon on your desktop and double-click it to open the AnyViewer application.
When AnyViewer opens, you'll see a window with two important pieces of information:
- Your ID: a 9-digit number that identifies your computer.
- Temporary password: a random password that changes each time you start AnyViewer.
NB: make a note of the 9-digit ID number and save it for future use.
Step 5: connect with our technician
- When your support session begins, our technician will ask for your AnyViewer ID and temporary password.
- Read the ID and temporary password from the AnyViewer window to the technician.
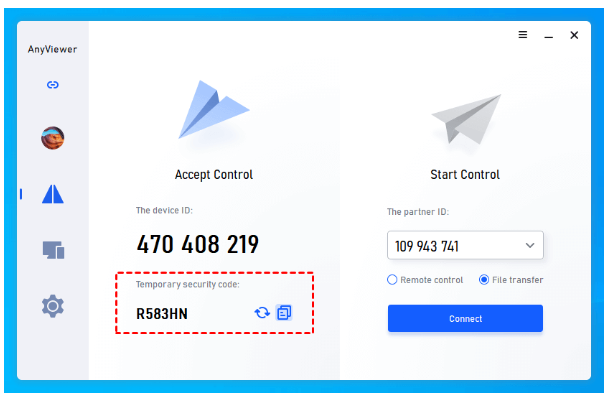
- Click "Allow" or "Accept" to grant permission for the remote session.
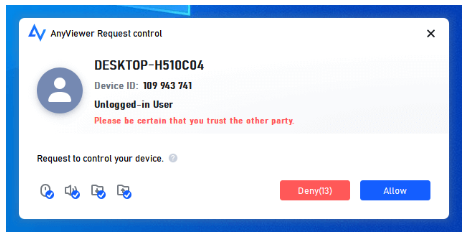
- You will see a connection request (from the technician) pop up on your screen. Click "Allow" and the remote session will commence. Even though they are available to use, you should try to avoid touching the keyboard or mouse, as the technician will now start working on your computer.
- You can now watch as the technician works on your computer.
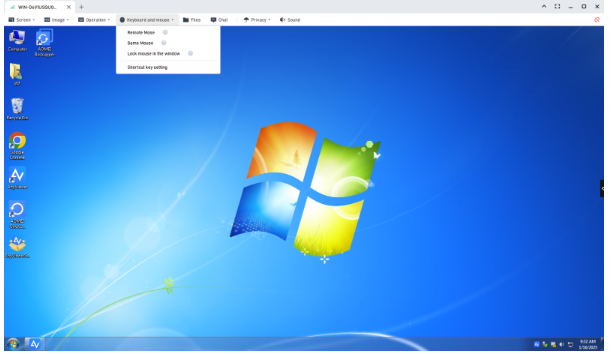
Tip: during the session, the technician may ask you to stop the session completely by closing AnyViewer and to restart the computer before starting another remote session. Sometimes device drivers and controllers, Windows updates and software need to be refreshed in Windows before continuing, otherwise errors may occur.
Step 6: during the support session
- Stay near your computer in case the technician has questions.
- Feel free to ask about anything the technician is doing.
- You can pause the session at any time if you need to use your computer.
- Don't turn off your computer or disconnect from the internet unless instructed.
Note: some complex issues may require multiple connections or computer restarts. This is normal; the technician will guide you through any necessary steps.
Step 7: after the session
- The technician will inform you when the session is complete.
- You can simply close the AnyViewer window to end the connection.
- AnyViewer will remain on your computer for future support sessions.
- You can uninstall AnyViewer if you prefer (but we recommend keeping it for future support needs).
To uninstall AnyViewer (if desired):
- Open Windows Settings.
- Go to Control Panel and, in the Control Panel window, click "Uninstall a program". Or go to "Apps" or "Apps and features".
- Find "AnyViewer" in the list.
- Click on it and select "Uninstall".
Troubleshooting tips
If AnyViewer won't install or run:
- Check that your internet connection is working.
- Temporarily disable your antivirus software and try again.
- Make sure you have administrator rights on your computer.
- Try downloading the software again.
- If AnyViewer loads but the device ID number is hidden, try reinstalling the software or downloading it again.
If the AnyViewer or internet connection fails:
- Ensure AnyViewer is running on your computer; if not, reload it and reconnect.
- Verify you've provided the correct ID and password to the technician.
- Check that you clicked "Allow" on the connection prompt.
- Restart AnyViewer and try again.
Need help with setup? Contact us before your scheduled session: tel. (+34) 613-996-905, email ComputerStudio@ServTec.Info, website ServTec.Info.